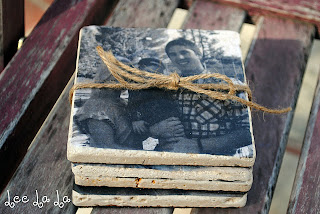
This little project was so easy and turned out so cute!
Here are a few extra tips...
- I got my tiles at Home Depot for less than $5 (they came in a set of 9 which was unfortunate because I didn't need that many... but since they were so inexpensive it was okay... I will just use them for another set of coasters)
- Printing on the tissue paper can be pretty tricky... but don't give up! It really helps to tape the tissue paper to paper like the tutorial suggested to help feed it through the printer (I think it would be nearly impossible without doing this). I didn't have any card stock so I used regular computer paper instead (which worked fine). Next time I will make sure I have card stock and see if that works better.
- In stead of printing out a 4x6 photo, I cropped my photos to 4x4 so I could see exactly what it would look like.
- I used the gloss modge podge and glossy clear coat and they worked really well.
- Instead of using felt on the back of the entire coaster, I cut a small circle piece of felt (like what you would but on the bottom of chair legs) into fourths and placed each piece on the four corners of the coasters.
Here is how my coasters turned out!
This is the back of the coaster like I was talking about in the tips.
This great little craft was so fun, inexpensive, and turned out really cute! My mom loved them when she opened them on Christmas morning. I highly suggest trying this project!


No comments:
Post a Comment