
I know I haven't posted much this summer, but for those of you have been around me or talked to me... you know I have been BORED! I have had things to do... but there would be days when I was so bored I could cry (not really, but almost!).... sooooooo I decided to do what I have always wanted to do to this lost, outdated, lonely table! Re-stain the top! Little did I know, this was a huge undertaking! I have Matt and my mom to thank for helping me get it done because I could have never done it by myself. I also must give credit to the blog I found on Pinterest as my inspiration for this table! I don't think my mom thought I would actually do it... I hope she wasn't to attached to the table ;)
Here is the table before.

The first thing we did was sand the top of the table. Now let me mention... I had never really sanded anything before. It was HARD! Thank goodness Matt was there to get most of the "ick"(aka polyurithane) off with his dad's belt sander! We used 80 grit sandpaper first to get rid of the finish, and then smoothed out the wood with 120 grit. And I must mention it was over 100 degrees... gotta love Texas summers! Also note, saw dust gets EVERYwhere! You can see it on the floor in the first picture! I had to take my dads car to the carwash when we were done with this step :) oops.


The next step was to prep the legs for paint. We decided to paint the legs before staining the top because you can always touch up paint, but you cant get paint off of stain. We used KrudKutter to take the finish off of the paint on the legs. It was really easy to used and saved us a lot of time and, trust me, trying to sand those round legs wouldn't have been pretty. You just put the liquid onto a rag and rub it on the surface and let it sit for a few minutes. The bottle said to wipe it off, but we didn't have to because it all soaked in. Then we painted two coats of light blue onto the legs!

We were then ready for the top of the table! YAY! My favorite and most anticipated part! I bought this great stencil at Hobby Lobby! It was exactly what I wanted and much less expensive than the $50-90 stencils I saw online!

My goal was to stencil the top of the table, and then stain over the stencil. I started in the very center of the table and went out from there to make sure that the stencil looked right. I used a mini foam roller to apply the stencil, masking tape to hold it in place, and an interior latex eggshell finish paint. I had never seriously stenciled before, but knew the keys for it to look good were to not use to much paint, take my time, and measure measure measure! Here is what the stencil looked like part way through.

After a lot of consideration, I strayed from my original plan at this point. At first I wanted to cover the whole table in stencil... but I really liked the way it was starting to look as a runner just down the center of the table... so I went with it. I am SO glad I did! Here is the stencil completely finished! We had to take the sander to a couple of spots where I accidentally over painted the stencil, but that took the paint right off.

Whew! So far, so good! I was perfectly in love with the way this table looked so far... which started to scare me because I wanted to use a dark stain. After an extra trip to Home Depot and a lot of reasoning, I went with my gut to use the dark stain. The exact reason, I don't really know... but I wanted to change the table from what it was before and I felt I would be able to do that more with a dark stain. I went with the Minwax Wood Finish in Dark Walnut. There were a lot of firsts in the project, including staining! Here are a couple of things I learned as I was staining... it takes a lot of rags, patience, and sometimes more than one coat... and it's realllllly messy! We looked like we tried to spray tan our forearms by the time we were finished!


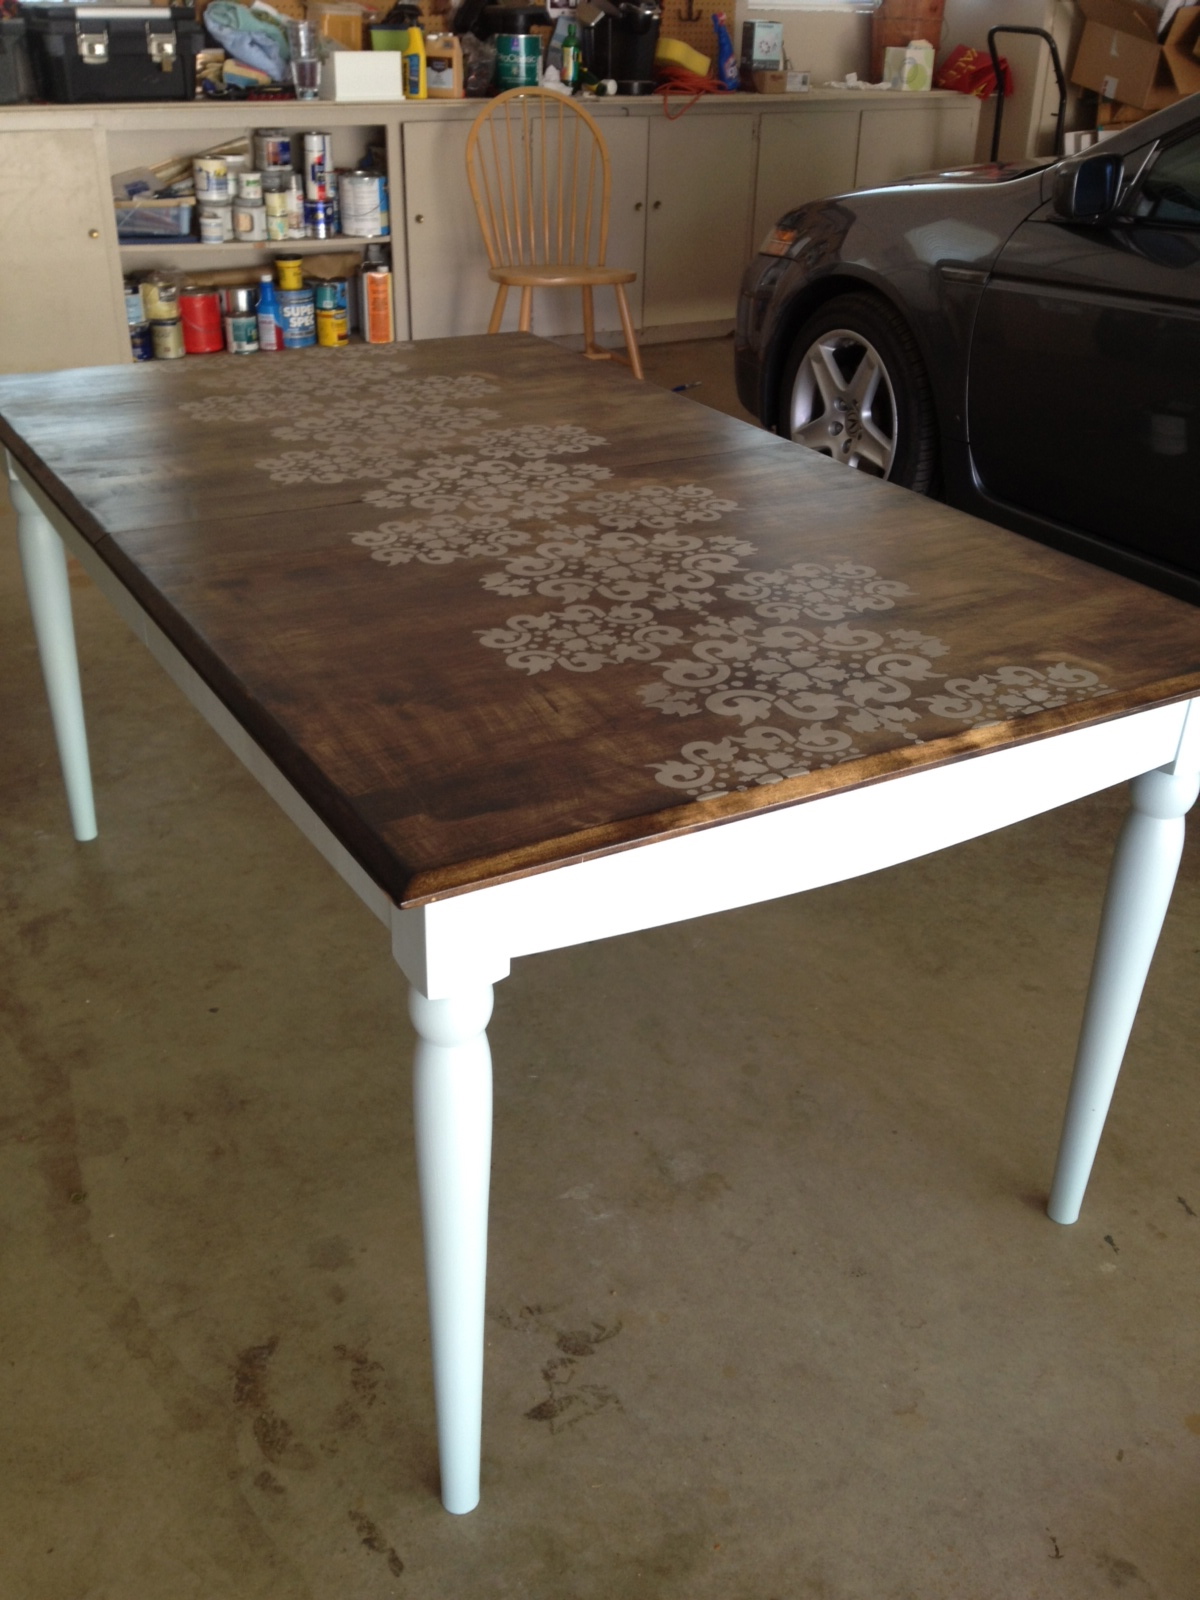
I am sure I would have loved the table with a light stain, but I am so glad that I went with my gut and used the dark stain! I love the way it brings out the stencil! At this point we weren't quite finished... I wanted to seal the table so it will last longer and be easier to clean! We used Minwax Water Based Polycrylic Protective Semi-Gloss Finish. We used soft bristle brushes and applied two coats. This was the final step for the table! So our old table now has a completely new look! (the legs look white, but I think that is because of the sunlight shining directly on them... they are light blue)

Right now I am working on painting the chairs! I have two out of six done and I am running out of time before the school year starts.. eek! I am painting them the same color as the legs using the same technique we used to paint the legs of the table. KrudKutter is a must! Here is the before and after of the chairs so far.


This has been such a fun project and I think for it being my first time to sand, stencil, and stain, it turned out pretty good! I LOVE it! It was totally worth all of the hard work!!
So if you have an old table that needs a revamp and some extra time on you hands... you should definitely give it a shot!!